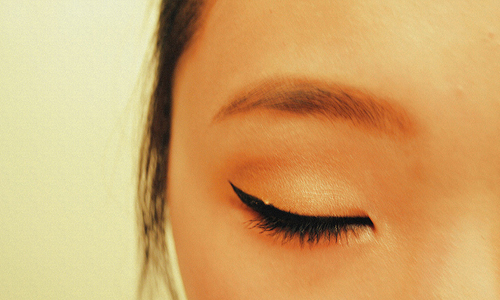
11 Steps To Do Winged Eyeliner

The winged eyeliner looks classy. It gives you that stylish yet mysterious look. Learning how to wing your eyeliner is easy, all it needs is a bit of patience and practice. The more you practice, the more skillful you’ll become at winging your eyeliner to perfection. So here’s how to wing your eyeliner.
1. First of all, choose a good quality liquid eyeliner.
2. Invest in a good makeup brush which should be thin with a fine tip.
3. Now move your head backwards, tilting it gently so that your eyelid is flat.
4. Now staying as close to your eyelashes as possible, draw a thin, smooth line of eyeliner with your brush. The line should start from the top inner corner of your eye and should go towards the outer corner of your eye.
5. Remember to keep your eyes relaxed and still while applying eyeliner.
6. Once you have applied, do not open your eye for 20-30 seconds so that the eyeliner gets sufficient time to dry.
7. Now draw the outer line of your wing which should be at an upward angle to give it the look of a ‘wing’.
8. For a bolder and dramatic look, you can make the wing longer, otherwise keep it subtle by making the wing smaller.
9. Now take some more eyeliner and move over the whole line again, to give a proper wing shape to your eyeliner. Remember that the tip of the wing should be kept thin, so you shouldn’t start from there. You should connect the wing back to your eye but as you reach the inner corner of the eye, leave it thin.
10. Once you are done, give it time to dry properly. Do not keep blinking as the eyeliner gets dry.
11. Before going out, check yourself in the mirror properly so that the eyeliner looks same and even on both the eyes.
Remember that you should practice a lot. Holding a brush and applying winged eyeliner is an art which you need to master by practicing continuously.


