7 Easter Crafts for Children
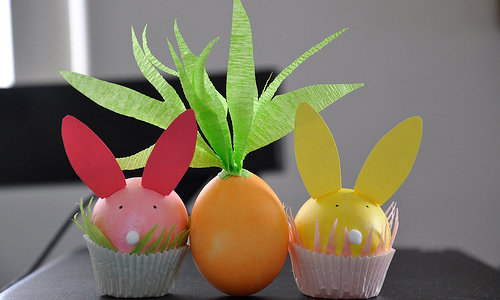
Easter is a time of celebration, color, candies and a lot of children’s crafts. Children love to make things, love to see their own creations. Won’t it be nice if they get to make their own set of Easter crafts? As one of those moms, who always wants to do interesting and fun things with her children, these Easter crafts provide you with a chance to let your kids enjoy and create! So go and read these wonderful Easter crafts for children.
1. Blo Pen Easter Eggs
Things you need:
Boiled eggs
Blo Pens in different colors
Paper towel
Cooling rack or film canister lids
Newspaper
Instructions:
1. Spread newspapers around your work area.
2. Wash and dry off the eggs thoroughly.
3. Spray colors on the eggs with different colored Blo Pens.
4. Let the eggs dry on a cooling rack or use film canister lids.
2. Swirled Easter Eggs
Things you need:
Boiled eggs
Craft paints in pastel colors
Tulip 3D Paint in different colors
Wax paper
Cooling rack or film canister lids
Fine glitter, optional
Instructions:
1. Wash and dry off the eggs thoroughly.
2. Tear off an A4 or similar sized piece of wax paper.
3. Crumple the wax paper and open it up.
4. Spurt a little amount of a few different colors on the wax paper.
5. Crumple the wax paper again to let the colors mix.
6. Place egg inside the paper and coat it with paint on one side.
7. Keep turning the egg around to let the paint coat all over the egg.
8. Spray some glitter if you want.
9. Keep the eggs to dry.
10. Using the Tulip 3D paint, write the person’s name who will receive the egg.
3. Wooden Spoon Puppet Bunny
Things you need:
Pink paint
Wooden spoon
Wiggly eyes
Pink pompom
Pink heart or circle sticker
Pale and bright pink craft foam
Pink pen
Glue
Instructions:
1. Paint the spoon pink and let it dry.
2. Cut two ears from the bright pink craft foam. Cut two smaller sized inner ears from the pale pink foam.
3. Stick the inner ears to the center of the bright pink ears. Stick the ears to the top of the spoon.
4. Glue the pink sticker on the back of the spoon as the nose and the wiggle eyes.
5. Glue the pink pompom to the handle as the tail.
6. Draw whiskers with the pink pen.
Your puppet bunny is ready to be played with!
4. Paper Plate Easter Bunny
Things you need:
White paper plate
White and pink construction paper or craft foam
Large pink pompoms
Small black pompom
Large wobble eyes
Strips of black card for the whiskers
Glue, stapler, sticky tape as desired
Black pen
Instructions:
1. Cut two ear shapes from the pink construction paper or craft foam.
2. Cut smaller sized ear shapes from the white construction paper or foam and glue the pink and white ear pieces together. Staple them to the paper plate.
3. Make the face – stick the wobble eyes and the black pompom as the nose. Glue the strips of black card as the whiskers and then glue the pink pompoms on them as cheeks. This leads to a good finish.
4. Make a smile on the bunny’s face with a black pen.

